


Distressed Flower
Picture 1. I used 2 x 2" die cut circle, 1-3/4" circle punch and 1-3/8 circle punch,
leaf die cut on the Birds and Blooms, and the button die cut.
Picture 2. Snip all the circles.
Picture 3. That is where you will begin tearing .
Picture 4. This is what your circles should look like after the tearing.
Picture 5. Spray circles with water front and back.
Picture 6. While still damp, start crumpling the circles.
Picture 7. When the circles are just a bit on the dry side, sponge the edges using White Craft ink.
Picture 8. I used the Cutter's Tool for the edges for distessing.
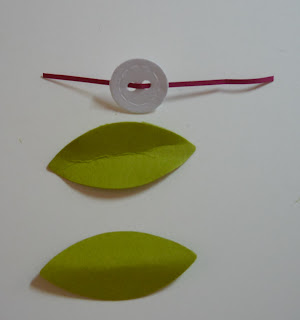
Picture 9. Slightly bend the leaves as seen in picture. Use a skinny strip of Rose Red for thread.
Picture 10. Here is the finished flower mounted with dimensionals in between layers.
Thanks for stopping by.
Have a woinderful Stampin' Day!!
Chat

3 comments:
Chat:
Thank you for the flower tutorials. I appreciate your clear step by step directions!
Liz
Thank you so much for the flower tutorials! I love it!
Greetings from Germany
Melanie
that's so pretty Chat! I love that look. Thanks for sharing - gonna have to try it now. :) Have a great day!
Post a Comment