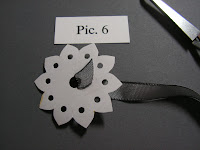
Pic. 6 To begin, secure the ribbon with regular
tape or adhesive.

Pic. 7 Start by threading the ribbon on the first hole down and
back to the center hole. You may want to use a needle to
do this.

Pic. 8 This is what it looks like halfway.

Pic. 9 Here is the finish ribbon flower. Secure the end with
tape or adhesive. Embellish as desired.

9 comments:
Wow, this is so cool, thanks for sharing.
Darling idea; I'd just been thinking yesterday that I wanted to do some ribbon flowers for cards, so you've inspired me to try some soon! I posted my first tut. today on a flower from paper & stampinwhenican mentioned it on her blog also -- she's the greatest!
Marge
Thanks so much for sharing with us ......!!!
That is beautiful! Thank you for sharing that technique! It always amazes me how creative some people are!
Wow!!! That's awesome!!
I love this ribbon flower... The possibilities are endless with the different stamps.....Great idea....
Pattie's passion (ckmb)
This is beautiful. Have it on my list of things to try. Thank you so much for sharing.
I finally broke out in sweats and attempted this. Here it is:http://www.splitcoaststampers.com/gallery/photo/776764?cat=3512
thanks for a great tutorial and blog I am sharing this with my advanced stampers who always want somehting new - you are so talented, i will be coming back again and again
Post a Comment